What’s in Mrs. Hale’s Receipt for the Million 1857?
1308. Butter.– Keep your pails, churn. and pans sweet. In winter warm the pans and churns with hot water, in summer cool them with cold. Keep your milk in summer where it is cool and airy, in winter where it is warm.
Make Butter, Understand History

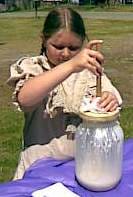
Call me silly, but I love making butter. I first learned how to make it while I taught at a pioneer cabin in the woods for a local school district. 3rd graders were my peeps as they experienced life in the late 19th Pacific NW. As they helped to get food on the table as part of their time out there, making butter was a simple way to include school age kids in the preparation of their lunch.
The tools were simple: service-size glass jars with a wooden dash and lid. Whipping cream was the only food put into the churn. The students rotated through stations. It usually took 40 minutes to turn cream into butter. Buttermilk was an afterthought. Lesson learned: if you don’t churn, you don’t get butter on your biscuits fresh out of the Dutch oven. Sometimes the butter never “came.” There was a lot of near-butter until I understood the process.
What I Learned
I’ve been making butter for quite a while now, most recently with my job at a museum. I have found this is a great way to teach pioneer life in the 19th century to student and adult alike. Taking the same churn, I have since learned how to make great butter in about 24 minutes.
Here’s what you need:

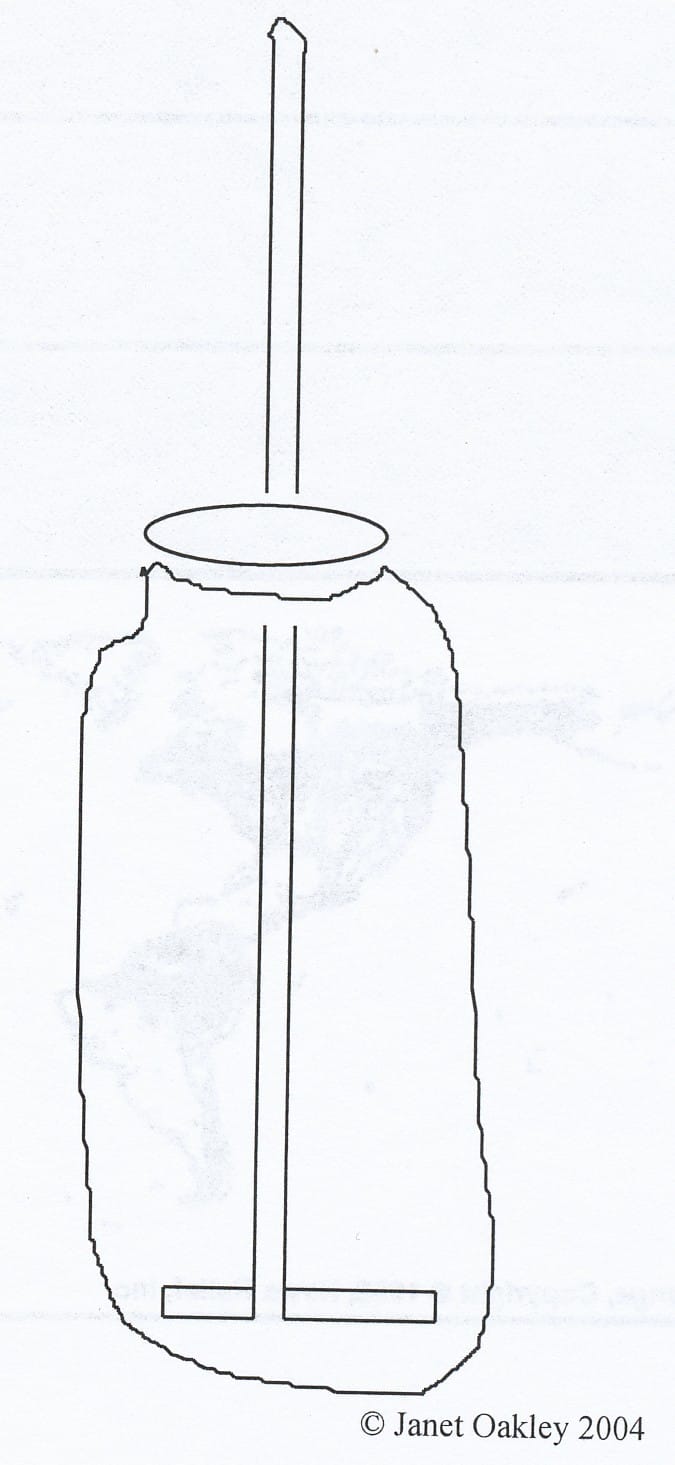
*A large glass jar (Costco might have this size)
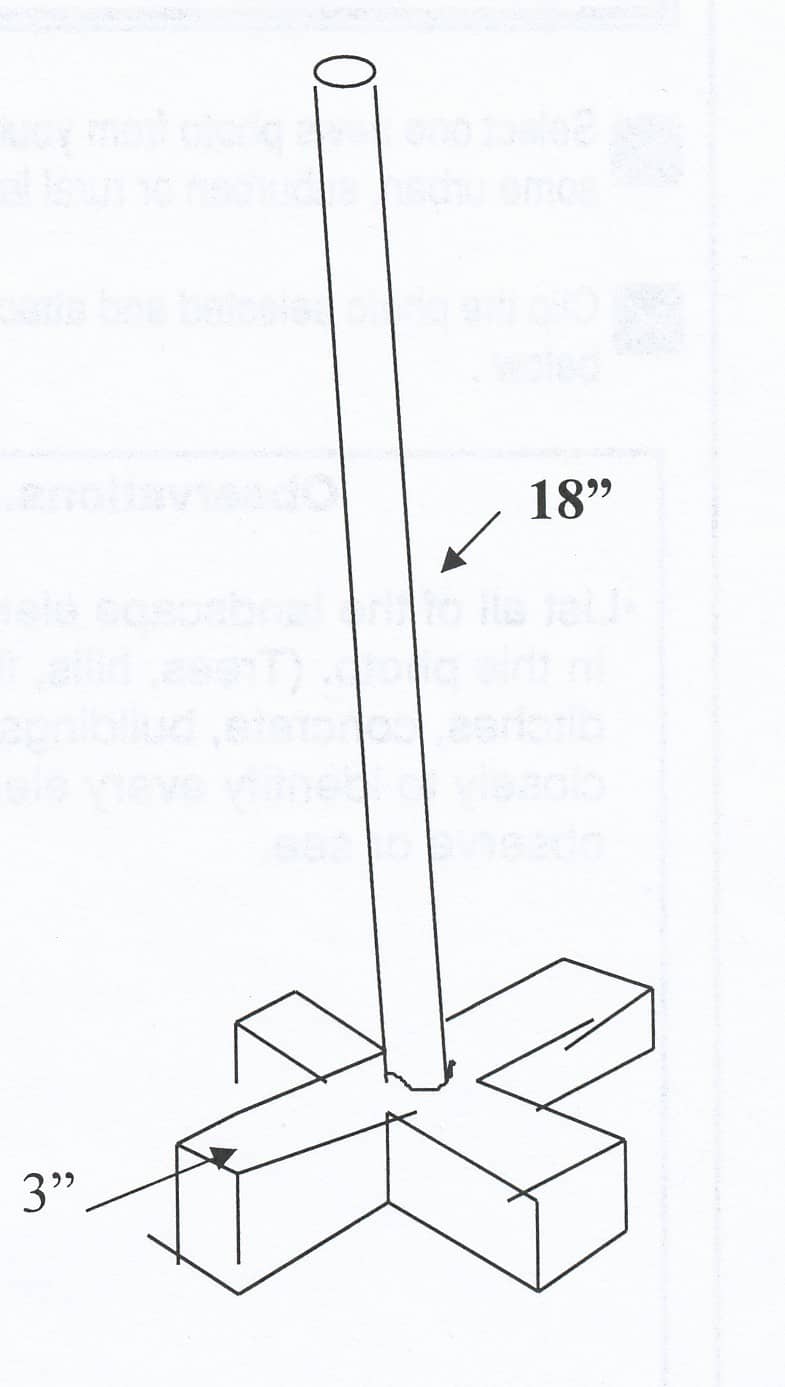
*A dash (1/2″ dowel with X cross pieces at bottom)
*A lid with hole in center for dash to go through
*a pint of whipping cream

Pour cream into churn. Insert dash. Put on lid. Place a paper towel around the dash. Using a steady beat (“come butter, come, come butter, come ” is a time-honored chant), slap the top of the cream. Try not to bang. As you work the butter it will go through different stages, from foamy whipped cream to a harder mass. The dash will tend to pack down on it.
It’s important to keep a steady beat to make the butter come. This means that buttermilk will separate from the butter fat and begin to splash on the sides of the jar. Keep working the butter until there is a lot of liquid in the jar. The butter fat will look like yellow clumps.
Problems with making the butter come can be helped in this way:
If the weather or room is hot, put churn into a pan of cold or ice water and splash the sides of the jar. If it is cool in the room, do the opposite and put the jar in hot water (not too hot to make it crack). Warmish? This action plus the continuing pumping of the dash.
Another point of making the butter come. Today, ultra-homogenized cream is often the only type available for churning. Organic whipping cream is faster, but the other cream is just fine. It just is harder to use. Don’t give up!
You’re Not Done Yet

Once the butter is made, the final product is not done. You have to WASH the butter. Huh? I never heard of this step either until I researched old receipts some time ago. This process is done commercially today, but it as in olden times, this is an important step to making sure that butter won’t spoil overnight. The buttermilk left in the butter can cause it to go bad. Remember, no refrigeration in homes until around the 1900s, and in some cases, ice boxes were the norm in many American communities. My 95 year old mom remembers the ice man in the 1920s in Boise, Idaho.
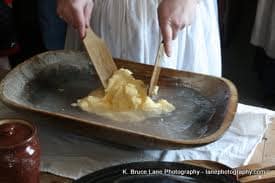
Washing the butter requires some equipment. A wooden salad bowl can replace the beautiful butter bowl above. Rubber spatulas for wooden paddles. You will need a pitcher of clear water (tap is just fine).

*First pour off the buttermilk into another container. This is great for drinking or for your pancakes and biscuits.
*Place butter fat into your bowl. Pour water over it. You don’t have to flood it with water. Enough to half cover it.
*Push down on the butter with the paddles, spatulas using a wiping movement. The water will be white. Pour off waste water and then add new water. Work the butter until the water around it is as clear as drinking water.
When doing large quantities, some housewives used butter boards. It has an attached rolling pin that is worked over the butter. As it is on elevated legs, the waste water flows down to a hole at the bottom of the wedged-shaped board and out into a pail below.
Off To Make Butter
I’m off to make butter at English Encampment. I’ve been demonstrating 19th century folkways for a over a dozen years. Come on over and celebrate the friendly occupation of San Juan Island 1860-1872.

Fascinating, Janet! I’m glad you’re keeping the “old ways” alive. I used to church butter when I was a kid, but we had a handle that spun the dash–maybe a little easier? I don’t know, not having done it the other way.
I still have a fond memory of making butter way back when in kindergarden. I love butter and all it’s creamy, salty smoothness. Thanks for giving us the recipe for a surefire way to success with this. And just think, all those kids will always hold you and their butter making experience in their memories!
Janet — one of my favorite pictures of me and my older brother is of us sitting on the kitchen floor with a butter churn. It was a big gallon (or maybe bigger) glass jar with a red plastic top. I love it that my mother at one time churned her own butter. Thank you for prompting this journey. Bethany